
Use DeepSeek R1 via API in Swift
Explore the practical aspects of integrating DeepSeek R1 into your Swift apps, including the model’s capabilities, how to access it via API, and the trade-offs between transparency & user experience.

You’ve probably heard of DeepSeek R1 by now! If not, it’s an open-source MIT license model from a company in China that is on par with OpenAI’s o1 reasoning model. What sets DeepSeek R1 apart is its transparency. Unlike OpenAI’s o1 model, which keeps its “thinking” process hidden, DeepSeek R1 reveals its reasoning steps, providing valuable context for both users and researchers.
Why Should a Model Think?
The first question that comes to mind is why is it important for a model to have a chain-of-thought to come to an answer? The main reason lies in the limitations of user prompts, which often lack sufficient context or detail. By generating “thinking” tokens and reasoning through a problem step by step, the model compensates for this gap, adding the necessary context to deliver more accurate and well-reasoned responses.
For example, if you ask ChatGPT 4o if 9.11 or 9.9 is higher, it’ll say that 9.11 > 9.9:
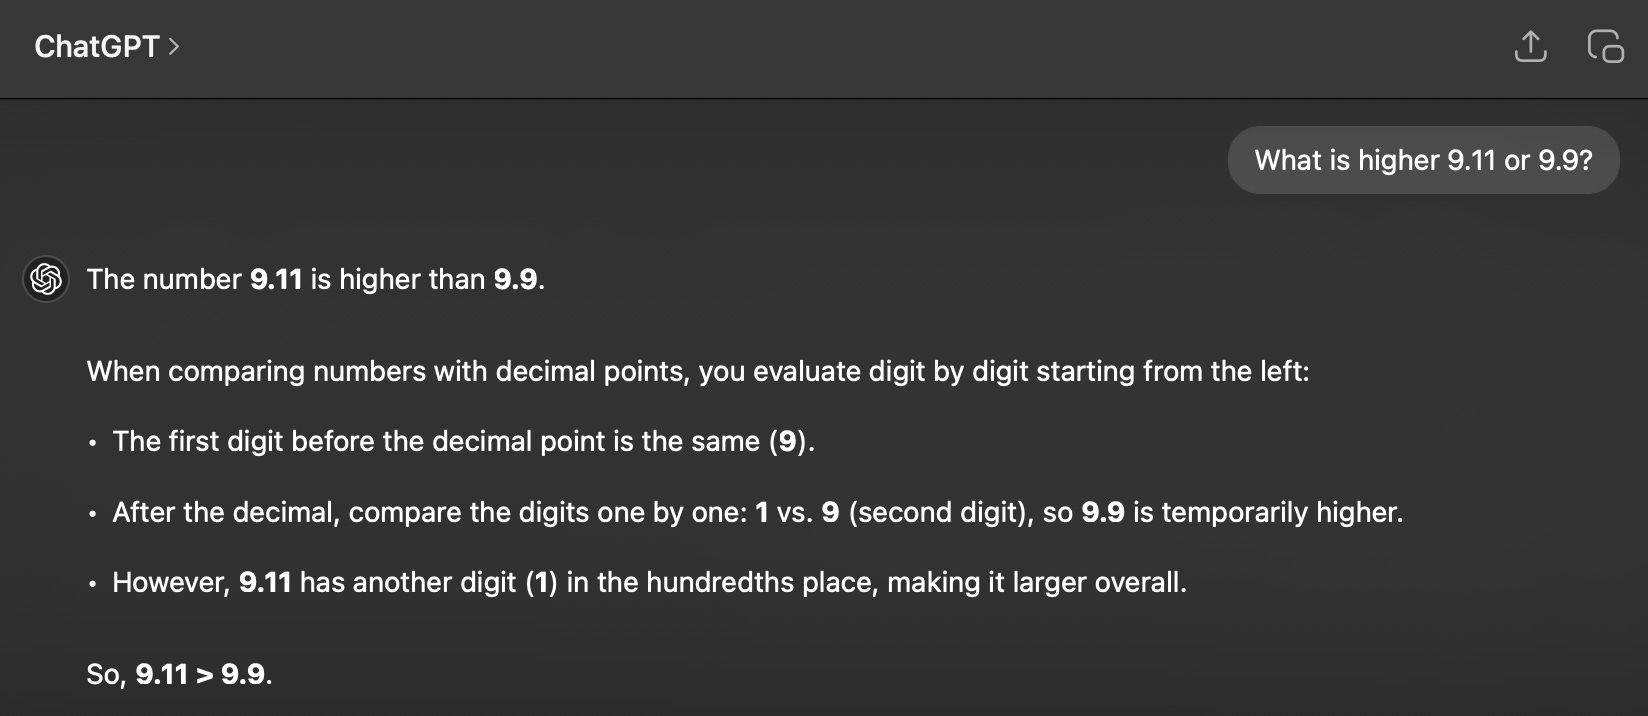
However if the model is allowed to “think” through the problem, it’ll come up with the correct answer. Here is the response from DeepSeek R1 (copied here as the response is too long to screenshot):
<think>
Okay, the user is asking which number is higher between 9.11 and 9.9. Let me think about how to approach this.

First, I remember that comparing decimals can sometimes be tricky because of the different number of decimal places. The user might be confused because 9.11 has two decimal places and 9.9 has just one. They might think that more digits mean a larger number, but that's not necessarily true when dealing with decimals.

So, to make it easier, I should align the decimal places. If I convert 9.9 to 9.90, then comparing it to 9.11 becomes straightforward. Now, both numbers have the same whole number part, which is 9, so that's equal. Next, look at the tenths place: 9 in 9.90 versus 1 in 9.11. Since 9 is greater than 1, 9.90 (which is the same as 9.9) is larger than 9.11.

Wait, but the user might not realize that the tenths place is more significant than the hundredths place. So I should explain that the first digit after the decimal (tenths) has a bigger impact on the value than the second digit (hundredths). Even though 9.11 has an 11 in the hundredths, it's only 0.11, whereas 9.9 is 0.90, which is much higher.

Let me check again to make sure I'm not making a mistake. 9.9 is indeed 9 and 9/10, which is 9.90. Comparing 9.90 and 9.11, the tenths place is 9 vs. 1. So yes, 9.9 is definitely higher.

I should structure the answer by first stating the correct number, then explaining the steps clearly. Using bold text for key points might help. Also, including a summary to reinforce the main idea would be good. The user probably wants a clear and concise explanation without any confusion.

Another thing to consider: maybe the user is learning about decimal comparison for the first time, so using simple terms and breaking down each step is important. They might have made a mistake in the past with similar problems, so ensuring the explanation is thorough but not overwhelming is key.

Alright, I think that covers it. Let me present the answer step-by-step to make it easy to follow.
</think>

**Answer:**
The number **9.9** is higher than 9.11.

**Explanation:**
1. Align the decimals by rewriting **9.9** as **9.90**.
2. Compare digit by digit:
   - Whole number part: Both are **9**.
   - Tenths place: **9** (in 9.90) vs. **1** (in 9.11).
   - Since **9 > 1**, **9.9** is larger.

**Key Insight:**
The tenths place (first decimal digit) determines the majority of the value. Even though 9.11 has more digits, its tenths place (1) is much smaller than 9.9's tenths place (9).
Should Your App Use a “Thinking” Model?
As a developer, deciding which model is best for your app is a process of testing different models and choosing the model that fits your specific use-case. The downside of “thinking” or “reasoning” models is that they are generating a lot of extra tokens, which you will be paying for.
The “thinking” also takes extra time - if you’ve used OpenAI’s o1 model, you’ve probably encountered cases where it thought for as long as 2 minutes or longer! As iOS developers, adding waiting an extra 2 minutes for a response is not a good mobile-based user experience.
If your app uses a Large Language Model (LLM) behind the scenes, where users don’t directly interact with it—for example, processing a journal entry to extract a summary, key points, and emotions—you have the advantage of crafting highly effective and precise prompts tailored to the task, in which case a “thinking” model won’t be necessary. You’ll be able to get a faster accurate response for less tokens with a smaller model.
However, if you’re app revolves around more complex tasks — ranging from advanced mathematical proofs and PhD-level analysis to high-stakes decision-making systems—where you have less control of the user input, a “thinking” model is better suited for the job.
Should Your App Expose the Thinking?
One intriguing aspect of the DeepSeek release is how much people enjoy watching the model think. There’s something “cute” about seeing the model struggle to arrive at an answer, going back and forth before settling on the right response. This transparency makes the model feel more relatable and human-like. However, I wonder if this is just a temporary fad - seeing the thinking for the first time is fun and cute, but it might become frustrating or tedious when users simply want quick answers.
In contrast, OpenAI has decided to hide the “thinking” of it’s o1 model, leaving users waiting for the final response. This was probably done to keep their model as proprietary and secret. But at the same time - whether the user should “see” the thinking is something that you, as a developer, would have to decide.
For applications where the answer alone is critical, it may not make sense to expose the reasoning process. However, at the same time, exposing the “thinking” guides the user to adjust their prompts or correct the model at the points of failure. A potential middle ground could involve offering the thinking process as an optional feature, allowing users to view it when needed without disrupting their overall experience.
As you can see from DeepSeek’s response above about which number is higher 9.11 or 9.9, the “thinking” is written within the <think></think> tags, so it is easy for you as a developer to extract it out and display it in the UI as you see fit.
Can I Run DeepSeek R1 locally?
Although DeepSeek R1 is open source and available on HuggingFace, at 685 billion parameters, it requires more than 400GB of storage!! So the answer is no, you cannot run it locally on your MacBook. Note that there are other smaller (distilled) DeepSeek models that you will find on Ollama, for example, which are only 4.5GB, and could be run locally, but these are NOT the same ones as the main 685B parameter model which is comparable to OpenAI’s o1 model.
If you work in a large corporation and want to use DeepSeek R1 on your own servers for the purpose of data privacy, that is for sure possible. However, if you’re a solo Swift developer or on a small team without an expert server-side engineer, it is possible to access this model via API by services that host them for you. This approach offers a practical solution without the need for extensive infrastructure.
How to Access DeepSeek R1 via API?
The two services that are currently hosting the full 685B parameter model are Together.ai and Fireworks.ai - both US-based companies.
Together.ai offers DeepSeek R1 at $7.00 / 1M tokens (applies to both input and output tokens), while Fireworks.ai offers DeepSeek R1 at $8.00 / 1M tokens ( input and output tokens). In contrast running OpenAI’s o1 model costs $15 / 1M input tokens ($7.50 / 1M cached* input tokens) and $60/ 1M output tokens.
Given that Together.ai is more cost-effective and compatible with the AIProxy library, which I plan to use, I will be accessing the DeepSeek R1 model through Together.ai.
Get your Together.ai API Key
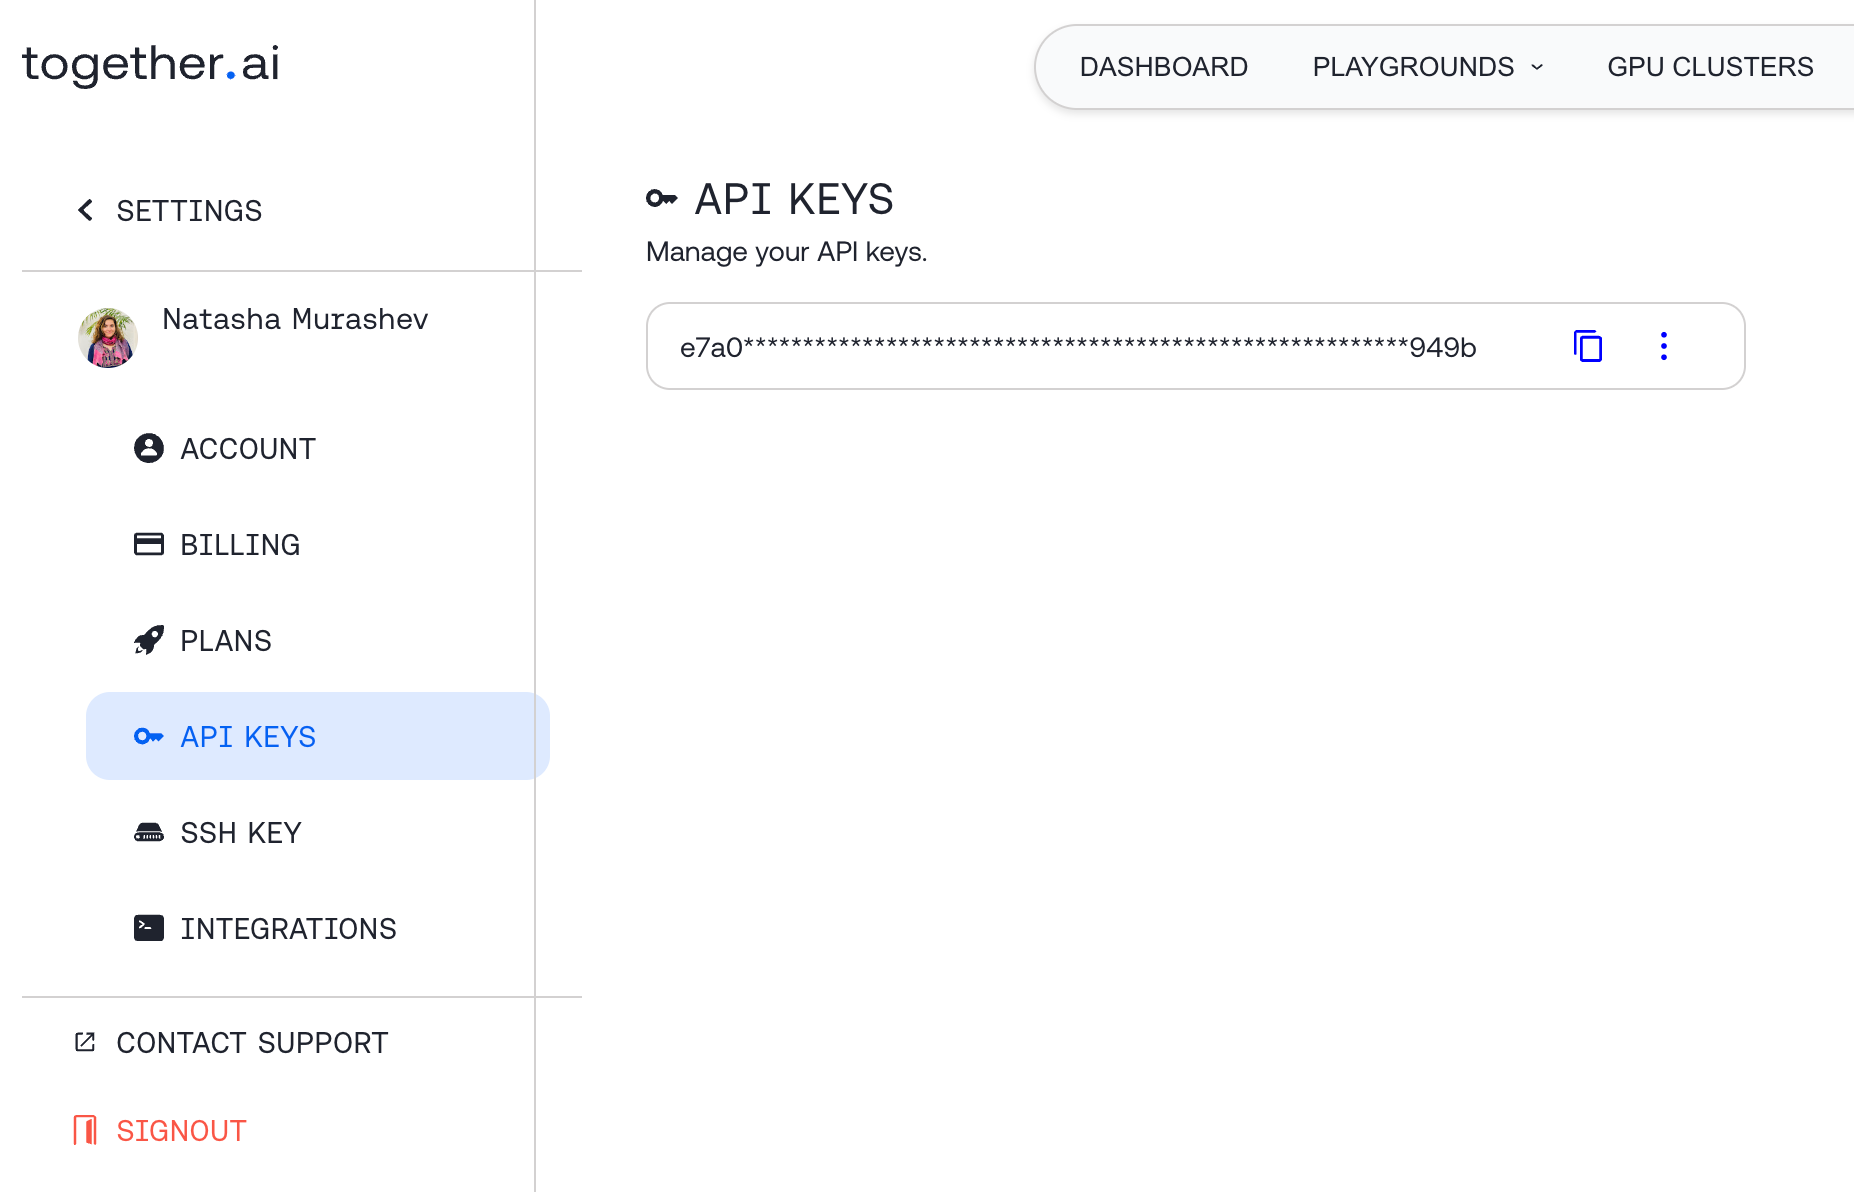
The first step is to sign up for Together.ai and add a bit of money to the account - under $5 is fine for testing purposes. When you go to your account settings, you will see your API Key:
Store your API Key in AIProxy
AIProxy is a service which allows you to securely store and manage API keys, switch between them as needed, and implement features like DeviceCheck and rate limiting to enhance security and control, reducing the chances of hackers accessing your API Keys via client-side storage and abusing them, leaving you with a large bill.
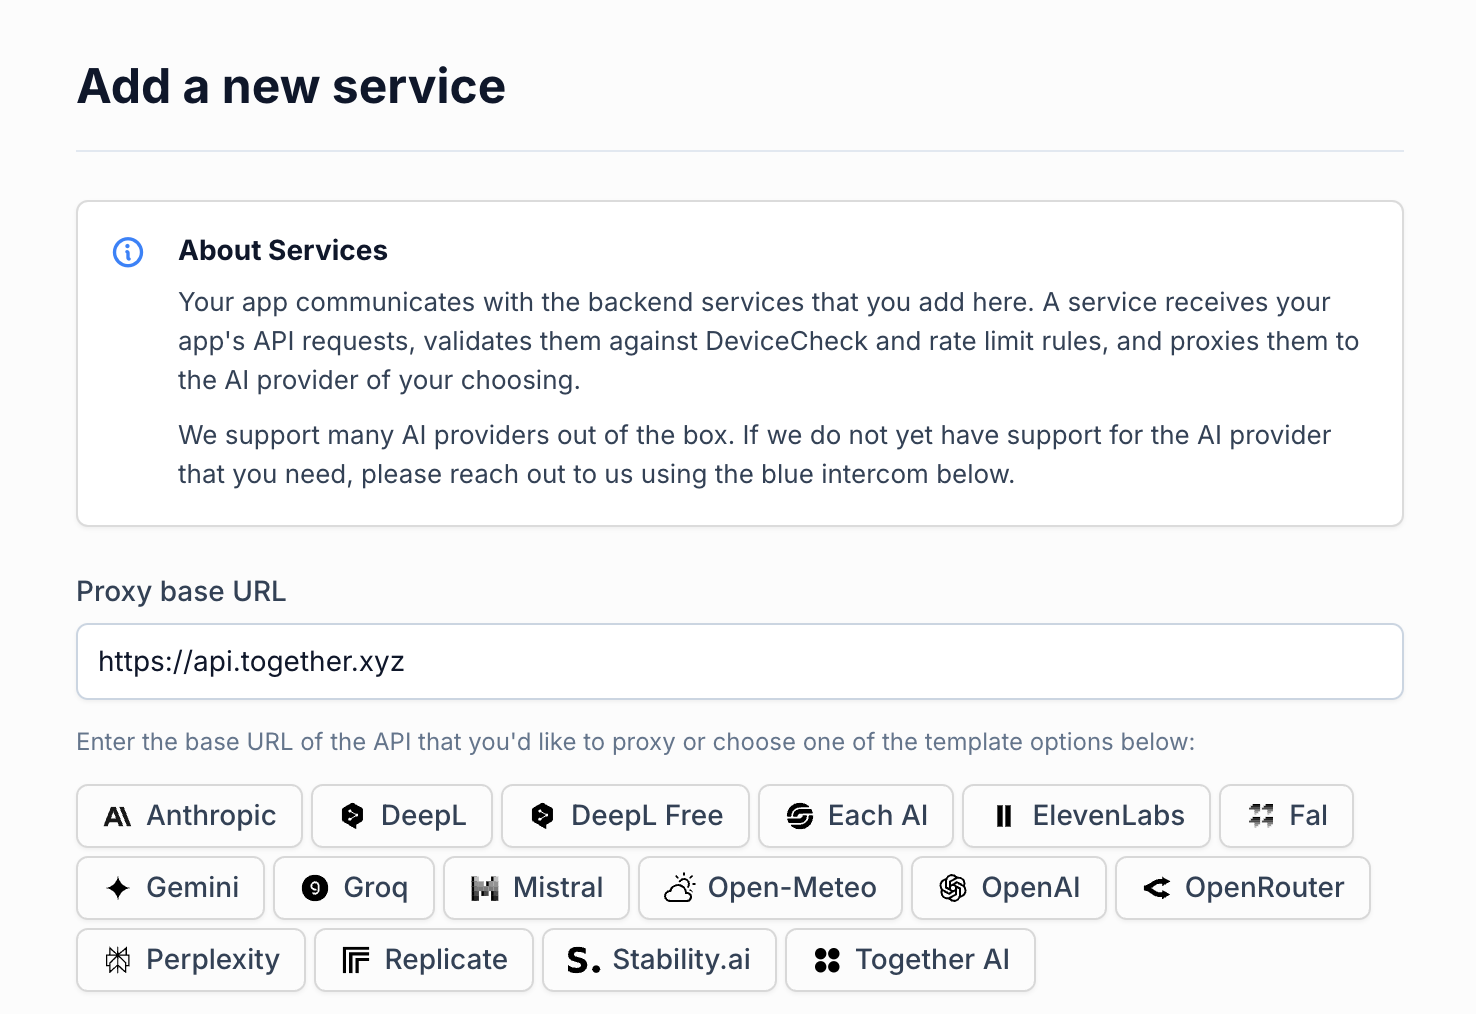
To get started, sign up for the service and create a new project. Add a new service and follow the instructions to set it up.
The Proxy base URL is simply the default Together AI one: https://api.together.xyz.
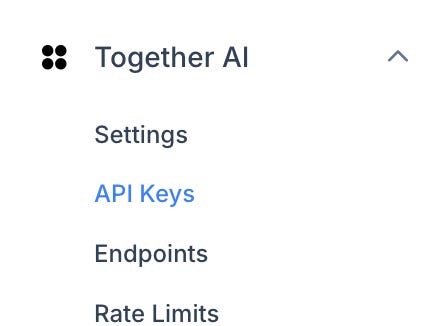
Add your Together.ai API Key to get the partialKey and serviceURL.
Follow the instructions as mentioned by AIProxy.
Finally - create a new Xcode project and add the AIProxySwift library as specified in the README.
Use AIProxySwift to make the Together.ai DeepSeek R1 model API Request
Once you have the project set up, with the AIProxySwift library installed and your partialKey and serviceURL, simply follow the AIProxy TogetherAI Swift examples. The Deepseek R1 model is “deepseek-ai/DeepSeek-R1”.
Note that from my experimentation, I wasn’t able to make a chat completion request for the DeepSeek R1 model specifically. That is because it takes sooooooo much time for the model to think! The request simply timed out. Instead, I successfully used the streaming request as follows in my ContentView:
// ContentView.swift

import SwiftUI
import AIProxy

struct ContentView: View {
    @State private var streamedResponse = ""
    @State private var isLoading = false

    var body: some View {
        VStack {
            ScrollView {
                VStack(alignment: .leading, spacing: 16) {

                    Text("What are some fun things to do in New York?")
                        .padding()
                        .background(Color.blue.opacity(0.1))
                        .cornerRadius(12)

                    if !streamedResponse.isEmpty || isLoading {
                        Text(streamedResponse)
                            .padding()
                            .background(Color.gray.opacity(0.1))
                            .cornerRadius(12)
                    }
                }
                .padding()
            }

            if isLoading {
                ProgressView()
                    .padding()
            }
        }
        .task {
            await streamResponse()
        }
    }

    private func streamResponse() async {
        isLoading = true

        let togetherAIService = AIProxy.togetherAIService(
            partialKey: "YOUR_PARTIAL_KEY",
            serviceURL: "YOUR_SERVICE_URL"
        )

        do {
            let requestBody = TogetherAIChatCompletionRequestBody(
                messages: [TogetherAIMessage(content: "What are some fun things to do in New York?", role: .user)],
                model: "deepseek-ai/DeepSeek-R1"
            )

            let stream = try await togetherAIService.streamingChatCompletionRequest(body: requestBody)

            for try await chunk in stream {
                if let content = chunk.choices.first?.delta.content {
                    // Update the UI with the new content
                    await MainActor.run {
                        streamedResponse += content
                    }
                }
            }
        } catch AIProxyError.unsuccessfulRequest(let statusCode, let responseBody) {
            print("Received \(statusCode) status code with response body: \(responseBody)")
            await MainActor.run {
                streamedResponse = "Error: Failed to get response from the server."
            }
        } catch {
            print("Could not create TogetherAI streaming chat completion: \(error.localizedDescription)")
            await MainActor.run {
                streamedResponse = "Error: \(error.localizedDescription)"
            }
        }

        await MainActor.run {
            isLoading = false
        }
    }
}
The result was as follows:
Notice that the video of streaming the response from DeepSeek R1 is over 4 minutes long!!!
Again - here you have to think about the tradeoffs of whether this is the right model for your app. One one side - reading the “thinking” of the model coming up with ideas about things to do in New York is interesting and even helpful.
While the initial prompt “What are some fun things to do in New York?” seemed like good enough for us as the user, we can see that it was not comprehensive. What is “fun” for you may not be “fun” for someone else. There are also many categories around activities - such as cultural experiences, going to the park, shopping, eating, etc. And then there is the pricing - the user didn’t specify a budget for example. Or how much time they’re spending in New York / how many fun things they can do.
While seeing only the answer might be “good enough” - seeing the thought process the model went through lets the user understand how to guide the model to be more specific in the things they specifically find to be fun and include more criteria in the follow-up prompt.
On the other hand - does your user actually want to read 4 minutes of text?!! These are the trade-offs that you as a developer have to make as you decide which model is best for your specific app use-case.