
How to Work with OpenAI's Batch API (not in Swift!)
Learn how to preprocess your data and save 50% on costs using OpenAI’s Batch API - with practical tips, Python scripting shortcuts, and a visual workflow to make it all easier.

Lately, I’ve been exploring ways to move beyond the real-time mindset when working with LLMs. Specifically, how we can preprocess existing data at the database level before users ever trigger a request. (If you’re curious, check out The Case for Preprocessing: Using LLMs Before Your Users Do.) One of the biggest wins? Using OpenAI’s Batch API can cut your costs in half (literally 50%!) while letting you scale efficiently.
So how do you actually use the Batch API? While I love building AI-powered apps in Swift, this is one of those cases where Python really shines, especially when you need to handle file processing like converting between .jsonl and .csv, etc. LLMs are exceptionally good at working with Python for these kinds of tasks. Just open up Cursor, paste in the Batch API docs docs (or turn on web search), and have it generate a custom script tailored to your needs.
I won’t dive too deep into writing the Python script - again, this part is incredibly easy with Cursor. What I do want to highlight, though (and this might not be immediately obvious), is that OpenAI provides a visual interface for submitting batch jobs. So really, the only script you need is one that splits your data into chunks of 50,000 or fewer entries and saves them as .jsonl files. From there, you can handle the rest visually, which, personally, I love.
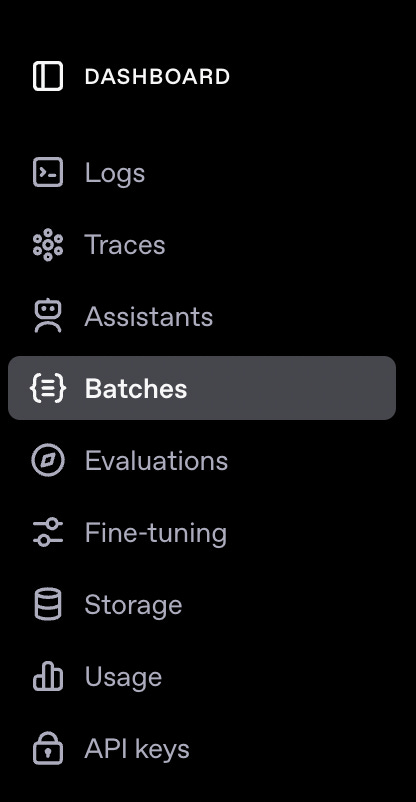
To get to OpenAI’s visual interface, select your project and go to your Dashboard, which you can find in the top right menu next to your account:

In the right-hand side menu, you’ll see several options, including the option for “Batches”:
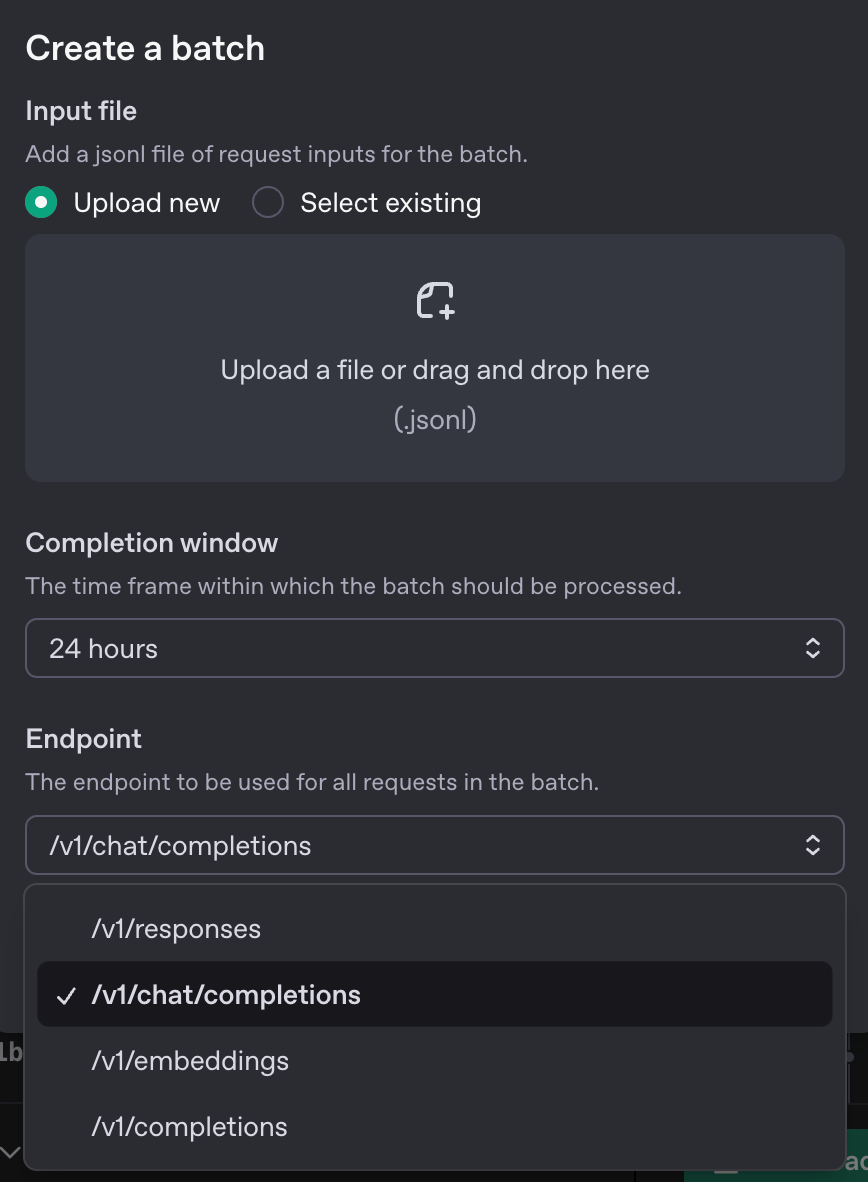
To create a new Batch job, simply upload your jsonl file and select the endpoint that it’s for:
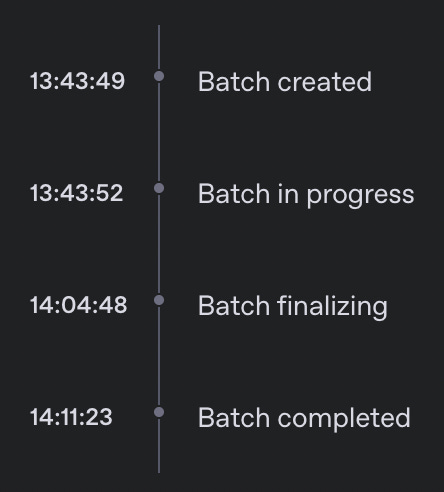
Once you create the batch, it’ll first validate that your data is in the correct format. If not, it’ll give a detailed error message, which you can use to fix your jsonl file. It’ll then take up to 24 hours to process the data:
Once it is completed, you’ll be able to download the output files and a file with errors if there are any - both in jsonl format. For example:

I know we’re all developers and are “supposed” to work via API, especially in the age of agents, but having this super nice interface for Batch jobs is super super nice to work with, and something that is unique to OpenAI.
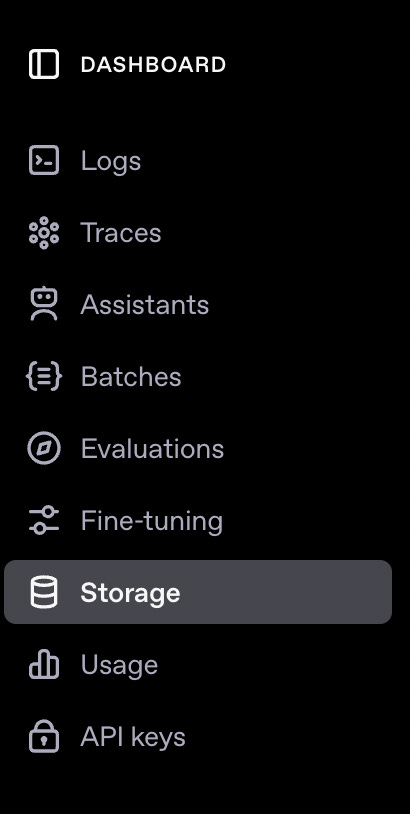
One last tip - whether you’re using the API or the UI, be sure to delete all your uploaded files and the batch files once you’re done processing the batch. OpenAI charges for file storage, so cleaning up afterwards can help you avoid unnecessary costs. You can do that via UI as well just by selecting “Storage” in the Dashboard menu. Super convenient!
Happy Batching!