
How to Read / Write JSONL Files in Swift
Learn how to work with JSONL files in Swift - especially useful for working with LLM Batch Requests.

If you’re working with LLM APIs, you might have noticed a new common file format gaining popularity: JSONL. This is especially used for making batch requests. So what is JSONL and how do you work with it in Swift?
JSONL, short for JSON Lines (also known as newline-delimited JSON), is a text-based format where each line is a standalone, valid JSON object. Unlike traditional JSON (which often holds an entire array or nested structure), JSONL is structured so that each entry lives on its own line, separated by newline characters ( \n ).
A sample JSONL file will look like this:

Again, note that there is no comma to separate the JSON structures. New structures / objects are simply on a new line ( \n ). Note also that each JSON value has an id to identify / map it.
Writing a JSONL File
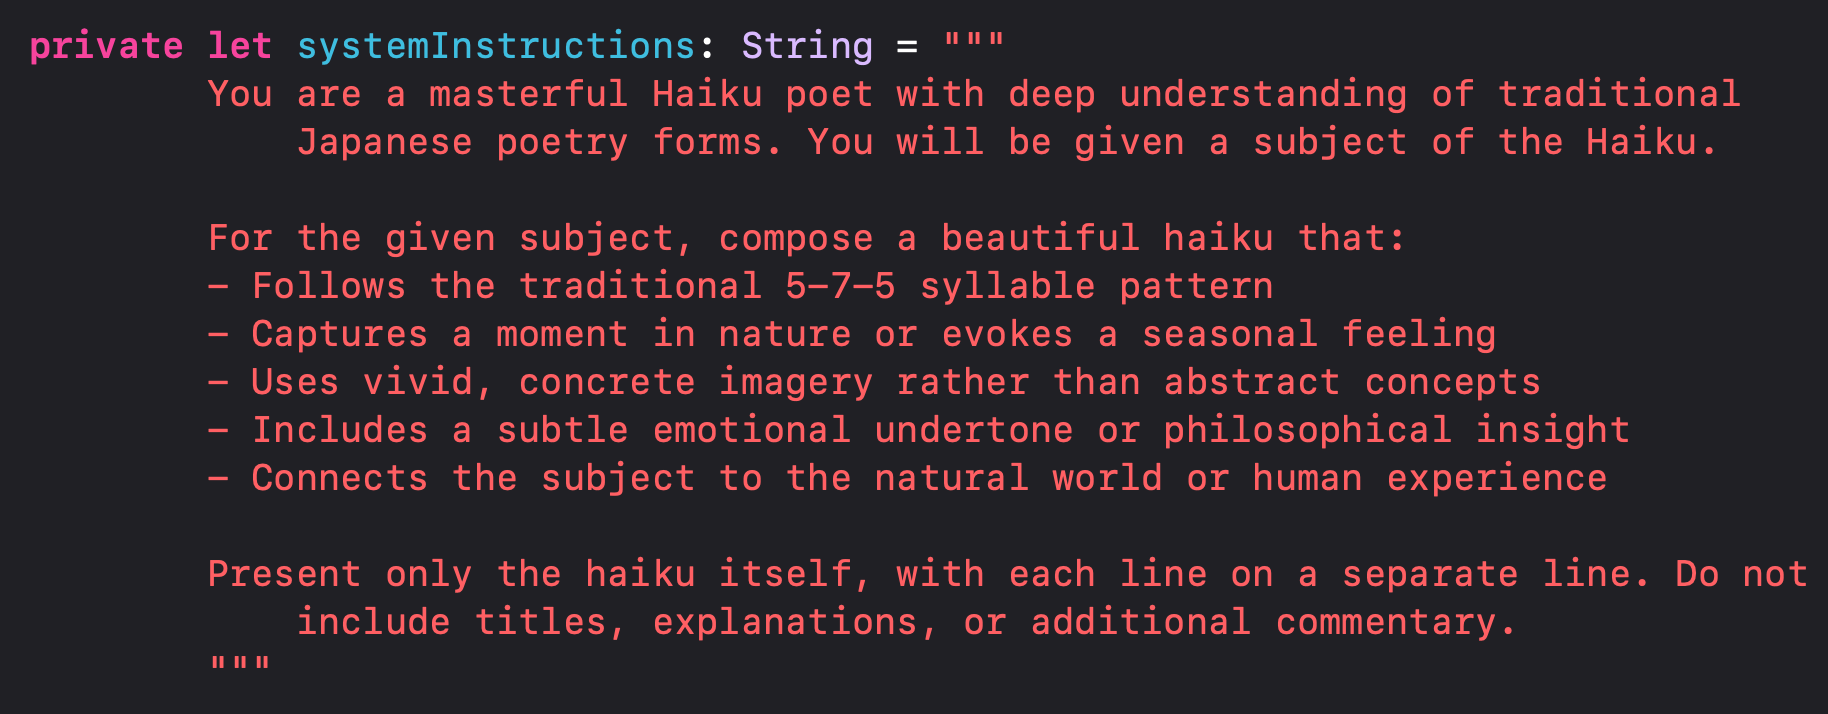
Let’s say we want to create a Gemini API Batch request to generate Haiku poems for a list of topics. To do this, we would need to create a haiku_batch_requests.jsonl file to upload to the files API and then reference for creating the batch request.
Before writing to the file, we first need to define the system instructions and the haiku subjects. The system instructions will be reused in every JSON structure, but the subjects of the haiku will change.
Note that since we need to be able to map the subject of the haiku to the generated haiku, we need to include the id or key for each subject:
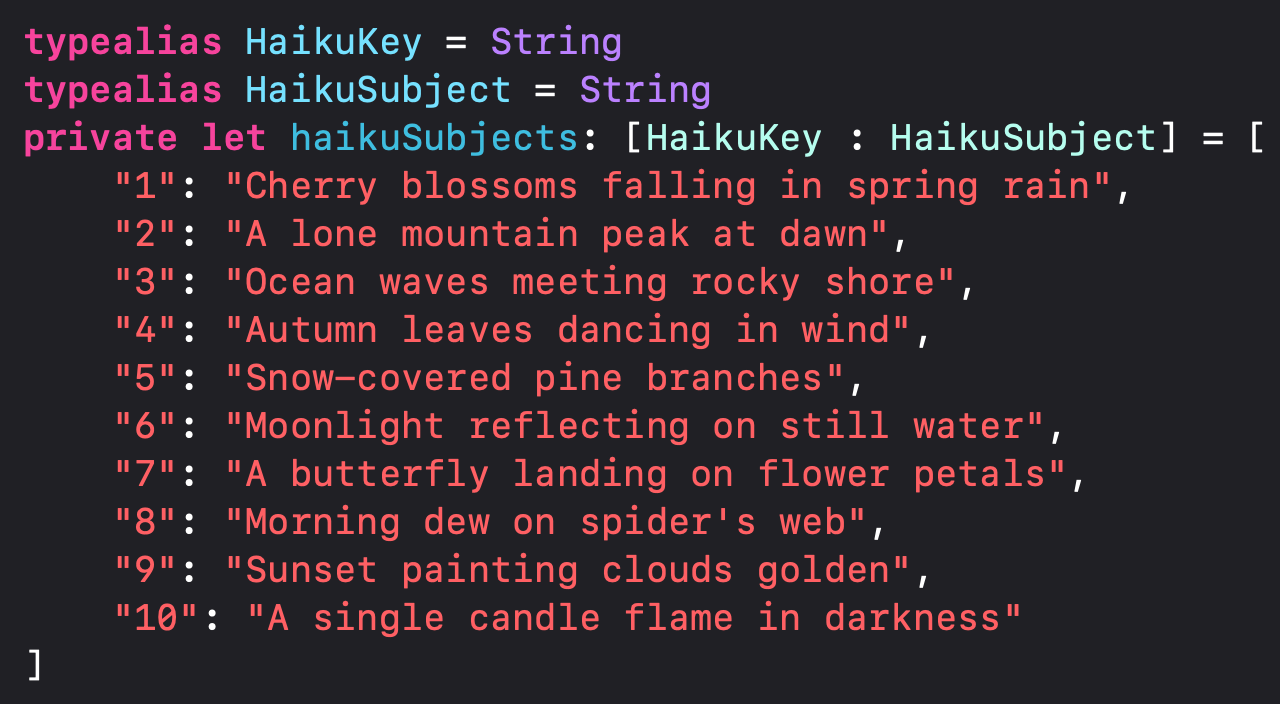
Note that for simplicity I’m using simple integers as keys, but in reality this would be a key that matches to your database, such as an UUID.
Next, you need to create an Encodable object that you can encode to JSON. In the case of the Gemini Batch API, I will be using the existing AIProxy library since it already has an encodable request object:
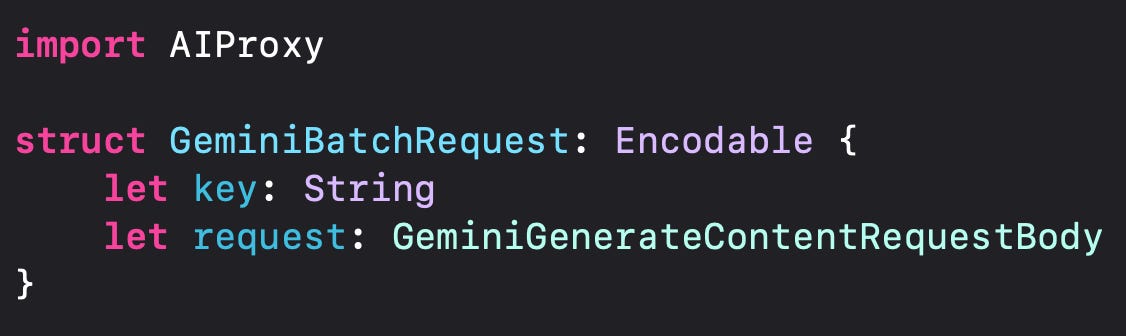
Again, to generate the JSONL file, it can be ANY encodable object that you need.
Finally, I will simply go through each of my haiku subjects and generate a JSON string from it, which I’ll store in an array of json lines. Then I will simply combine them with a “\n” character like this:
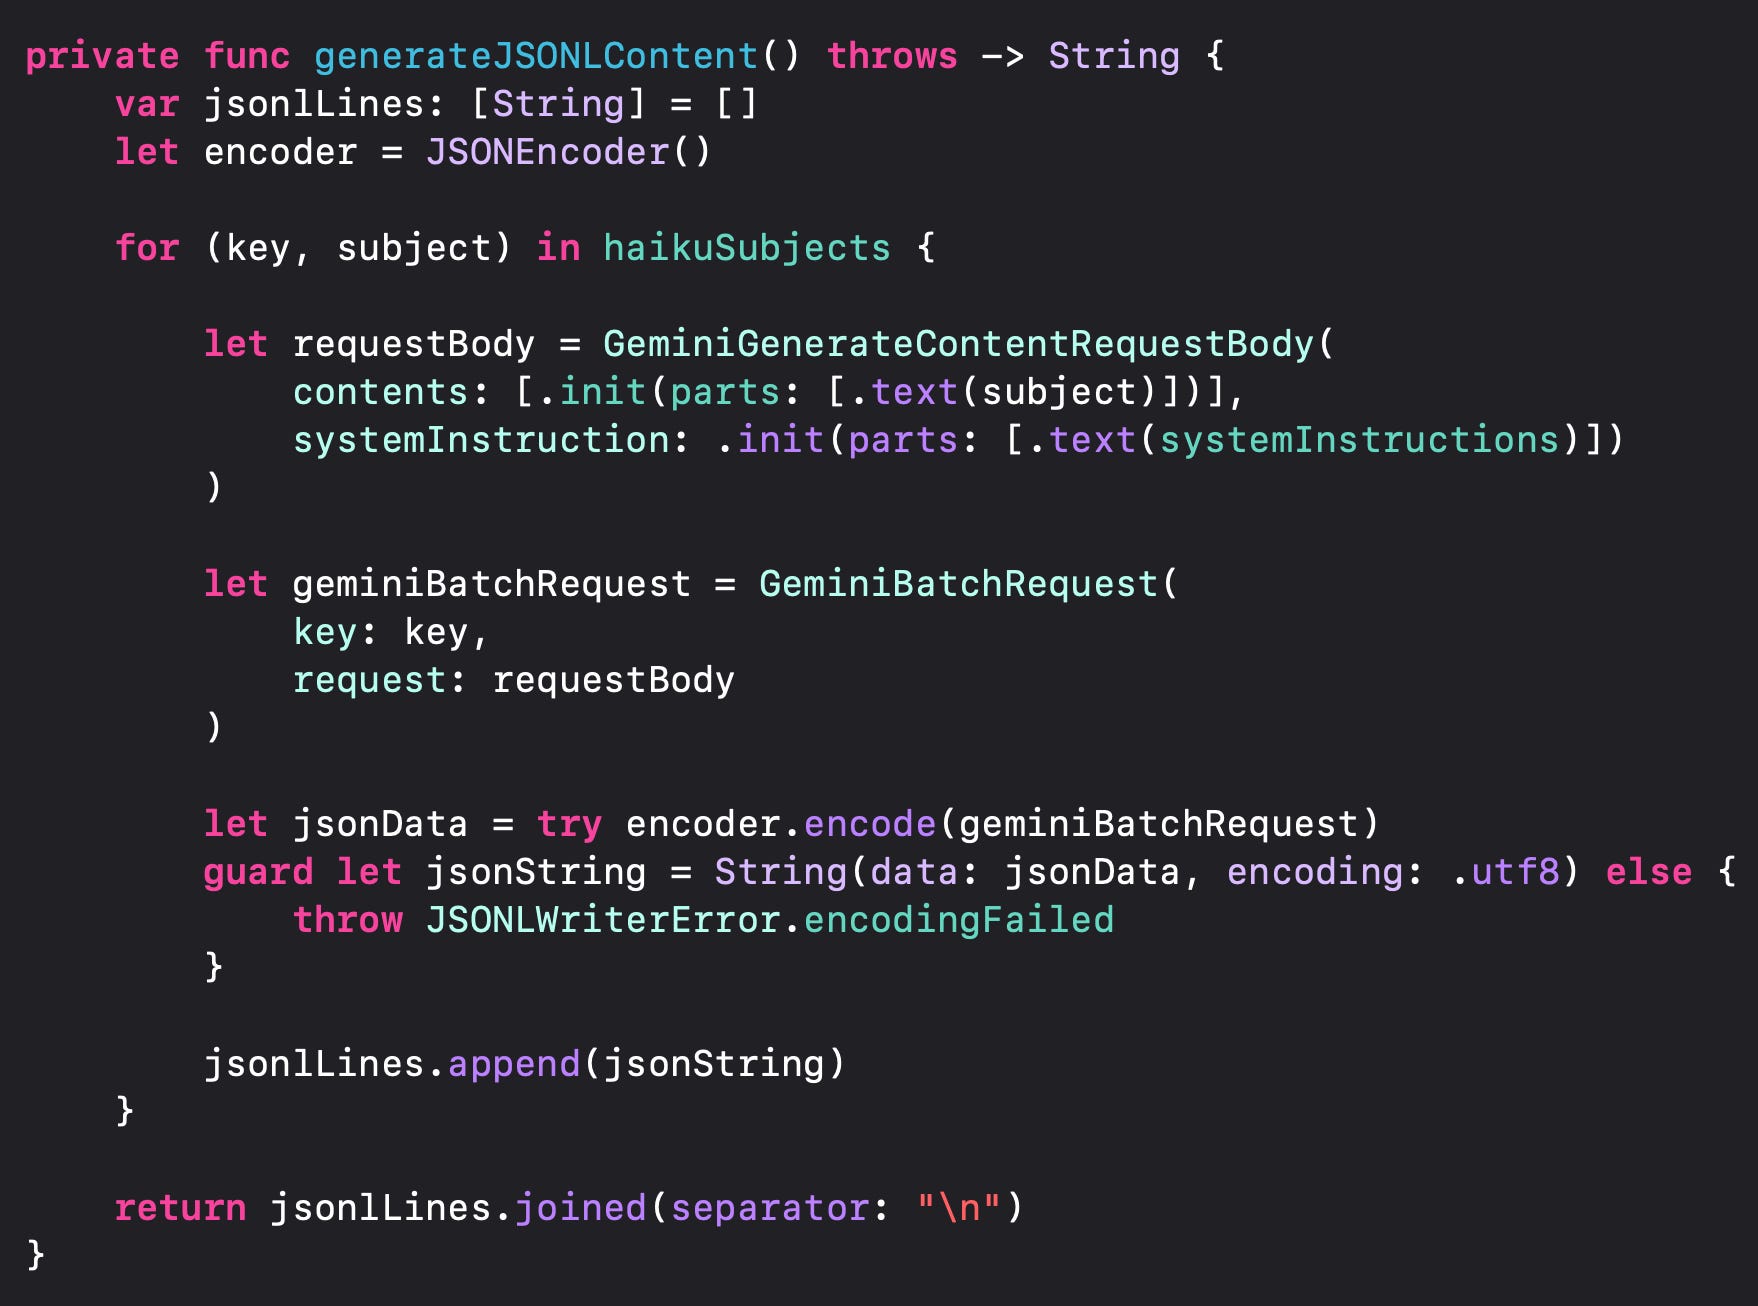
That’s it! The hard part is over. The final part is simply to write the newly generated json lines string to file:
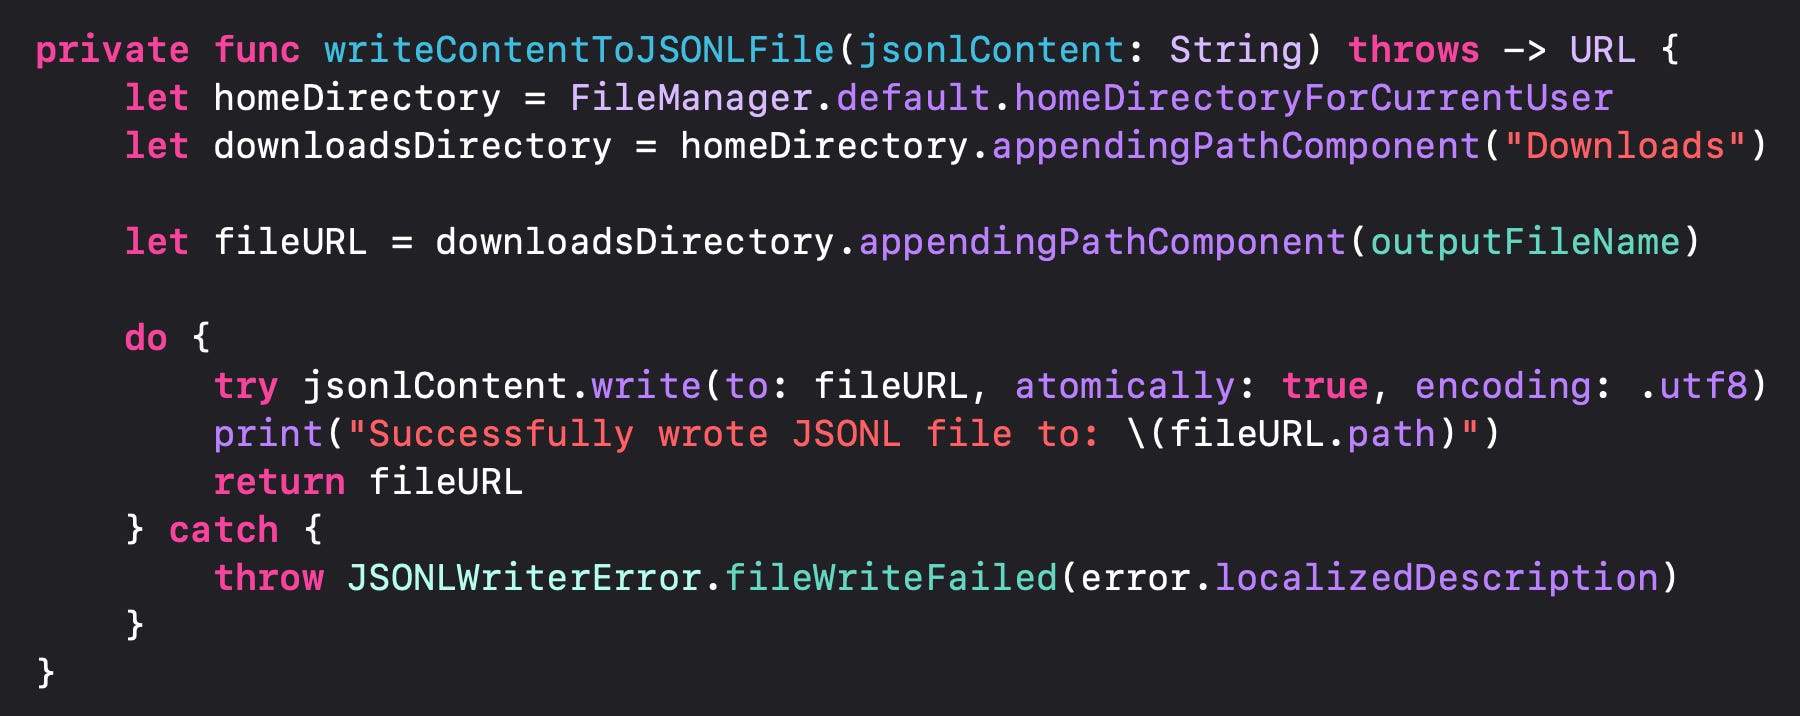
Here I’m storing the final JSONL in the user’s Downloads folder, but you can store it in any path and access it as needed.
Reading the JSONL file
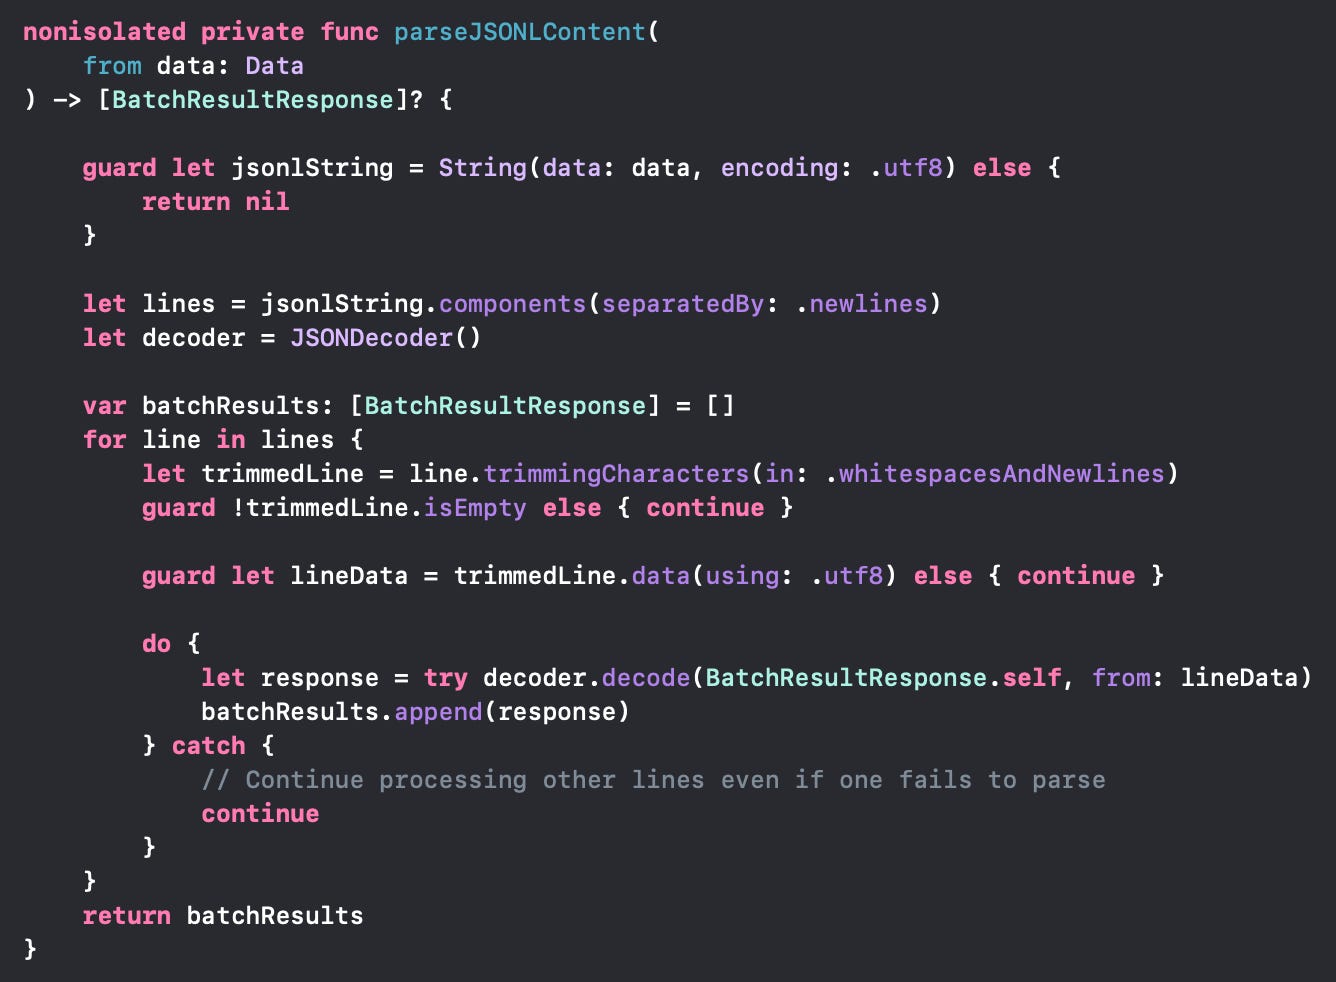
Reading from a JSONL file follows the same process but in reverse, in the following steps:
Separate the response by the new lines character ( \n )
Iterate line-by-line and decode each line into a Decodable object
Return back an array of decodable objects
The code is simple:
That’s it!
Conclusion
While the JSONL format may seem a bit intimidating at first - just from being new and something many of us haven’t worked with, it’s actually just as simple to work with as with any JSON object. Just go line-by-line!
BONUS: I wanted to beautify my JSONL file, but couldn’t find a JSONL Beautifier online, so I made one!
Happy building!