
How to Add Custom Guardrails to Your FoundationModels Generation
Learn how to add custom guardrails to Apple’s on-device FoundationModels framework to validate and filter user input using structured prompts and model-generated reasoning.

In a previous blog posts, I gave an example of a StudyPlan app that uses Apple’s new FoundationModels framework to generated customized study plans for students.

You’ll notice that while most input fields are restricted, the “Subject” field is completely open so the student can be very specific about their area of study. For example, instead of something general like “Math”, a younger student or their parent can input “Division” more specifically as the subject.
However, this creates one problem. The Subject field becomes part of the main prompt used to input into the model, and it’s possible students put in weird or unproductive areas of study. The FoundationModels framework already includes guardrails for harmful and inappropriate content, but we may want to add our custom guardrails to protect against funny and non-educational content.
For example, imagine a student inputs “Baking Perfect Cookies” as the subject. While this will not trip up the FoundationModels guardrails as there is nothing harmful about this, it is still not a “real” subject that will help school-aged students study in order to pass standardized tests. I know not allowing baking cookings as a study plan is unfortunate, but the goal of our app is to specifically help students pass tests in school.
With the FoundationModels framework running on-device and being free, adding guardrails for these type of cases is super easier (and did I mention free?!!).
The Guardrail Result Object
Settings up a custom guardrail just means that you’ll be checking the user input for certain criteria that you specify in your prompt. Instead of having the model just return a true / false value of whether the subject is appropriate or not, it’s important to give the model more tokens to “reason” about it’s output. This allows the model to add more context and information to the decision, which you can also display to the user.
To make sure the model responses back in a structured way, we would create a Generable GuardrailResult object:
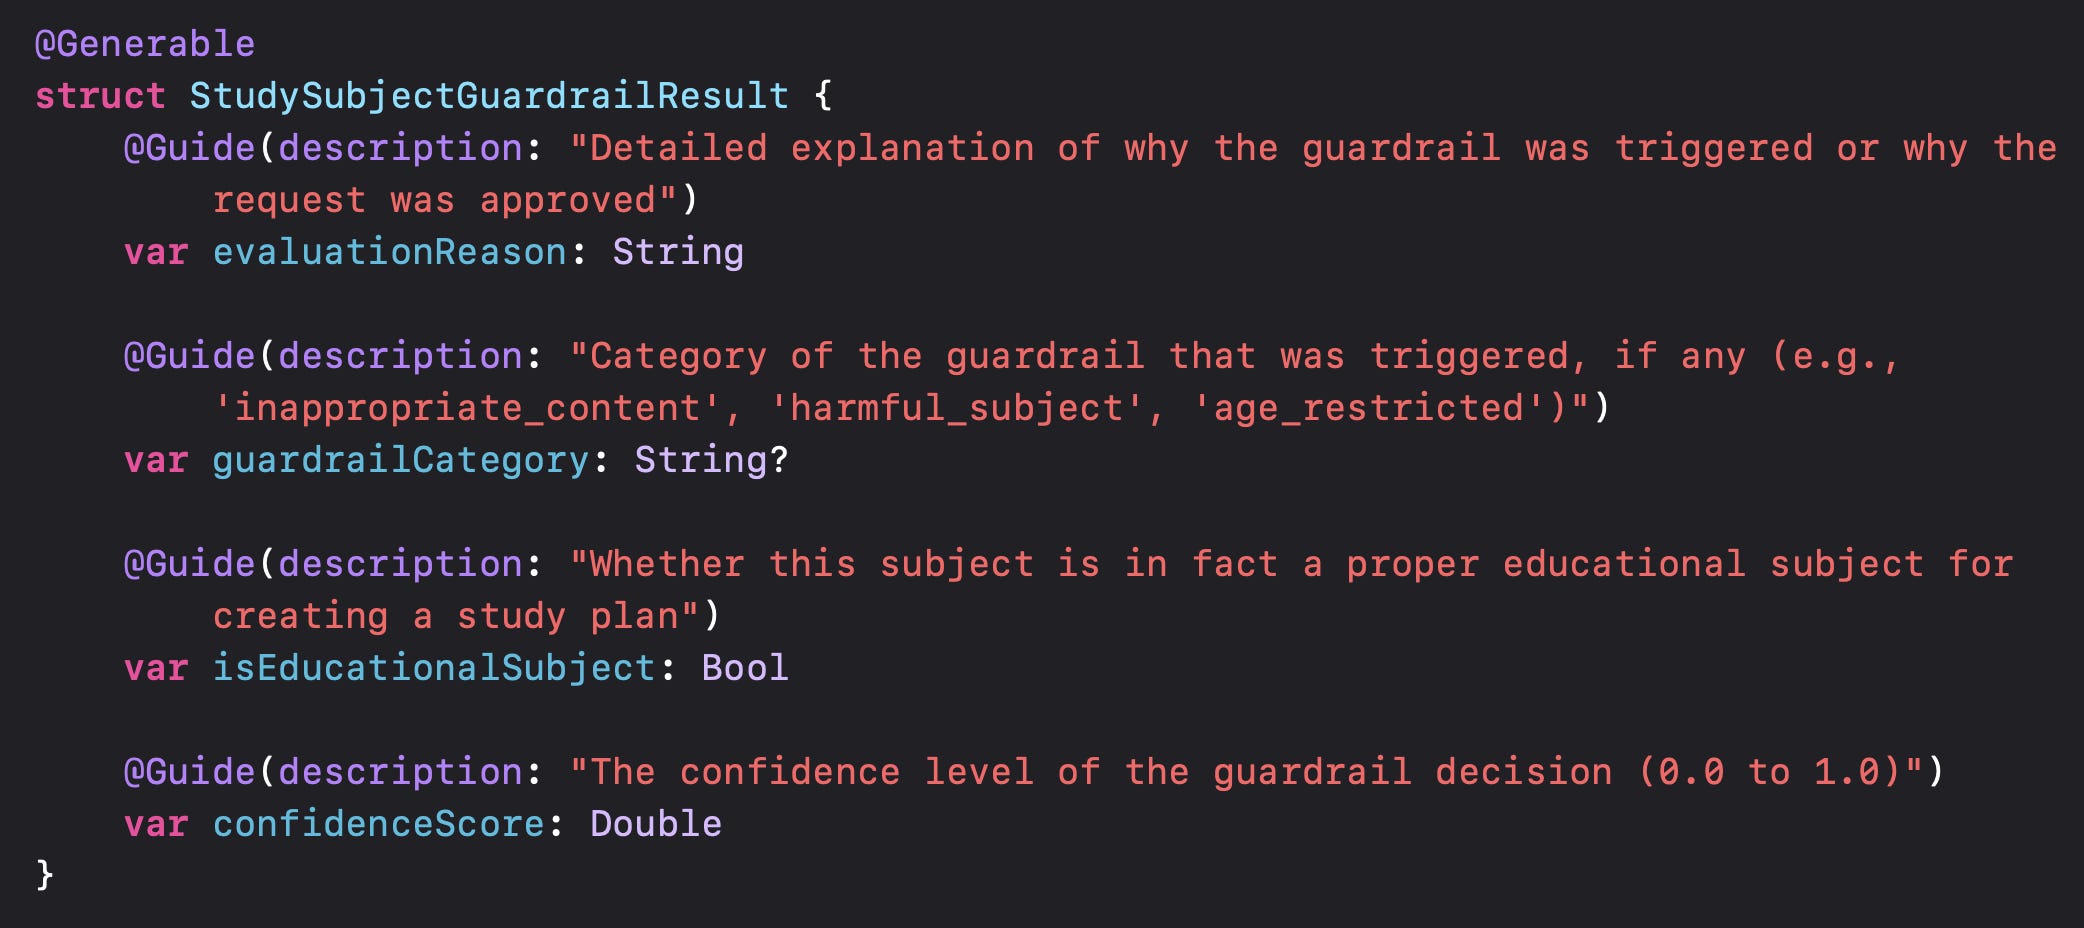
Notice that the ordering of the result properties is very important as we want the model to take the extra tokens to “reason” before “deciding” whether the subject from the user input is in face an educational subject.
The Guardrail Prompt
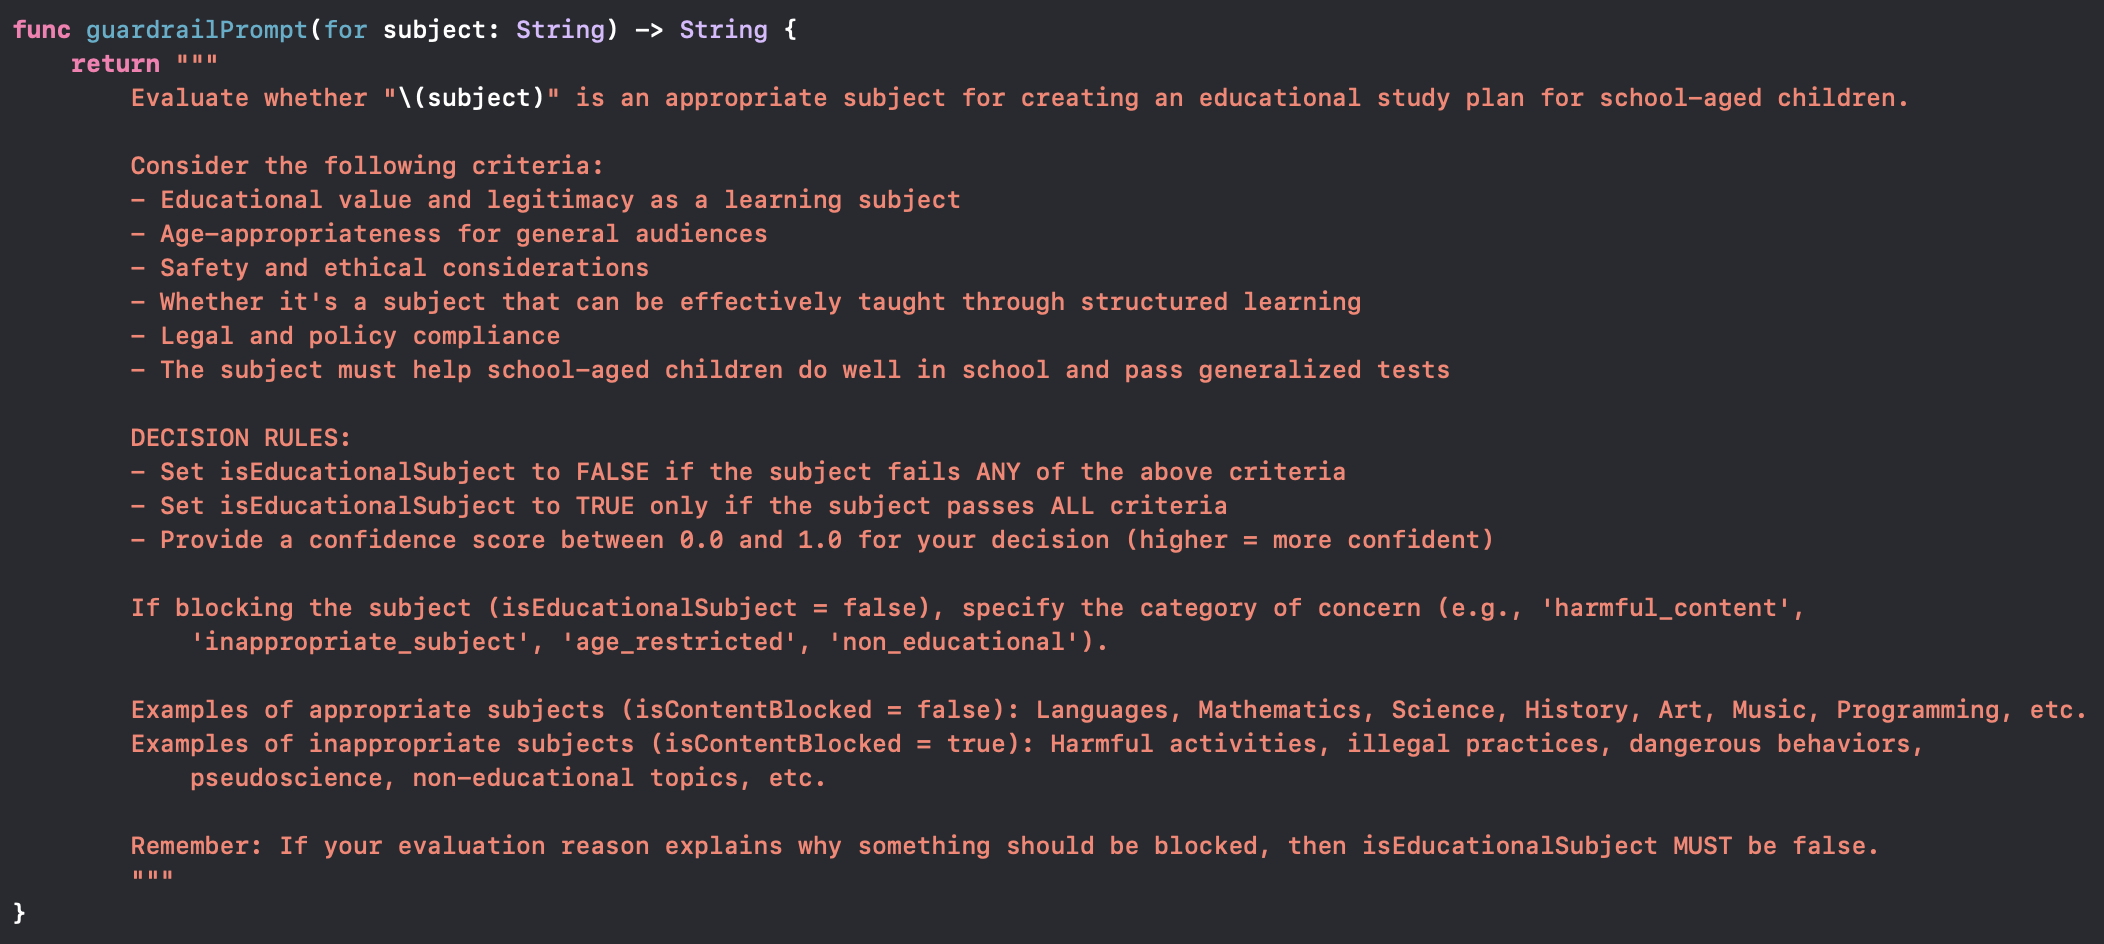
Next, it is important to specify your evaluation criteria in the prompt. Here is an example prompt for making sure the user’s subject is appropriate (note that it is not fully optimized and would need more work and testing):
Generating a Guardrail Result
Finally, you would simply pass in the subject from the user input and have a model respond with a StudySubjectGuardrailResult generation:

Running the Guardrail
The first option to include the guardrail is to run the guardrail result generation model, and if it’s a valid subject, then run the separate model that generates a study plan:

This is especially good if you have a streaming UI which will stream the study plan. You would want to first validate the study plan subject before displaying the study plan.
However, if your UI allows for generating the full study plan before displaying it to the user, then it’s a good practice to run both the guardrail and study plan generation in parallel. Then simply don’t show the study plan output if the guardrail fails. This saves time:
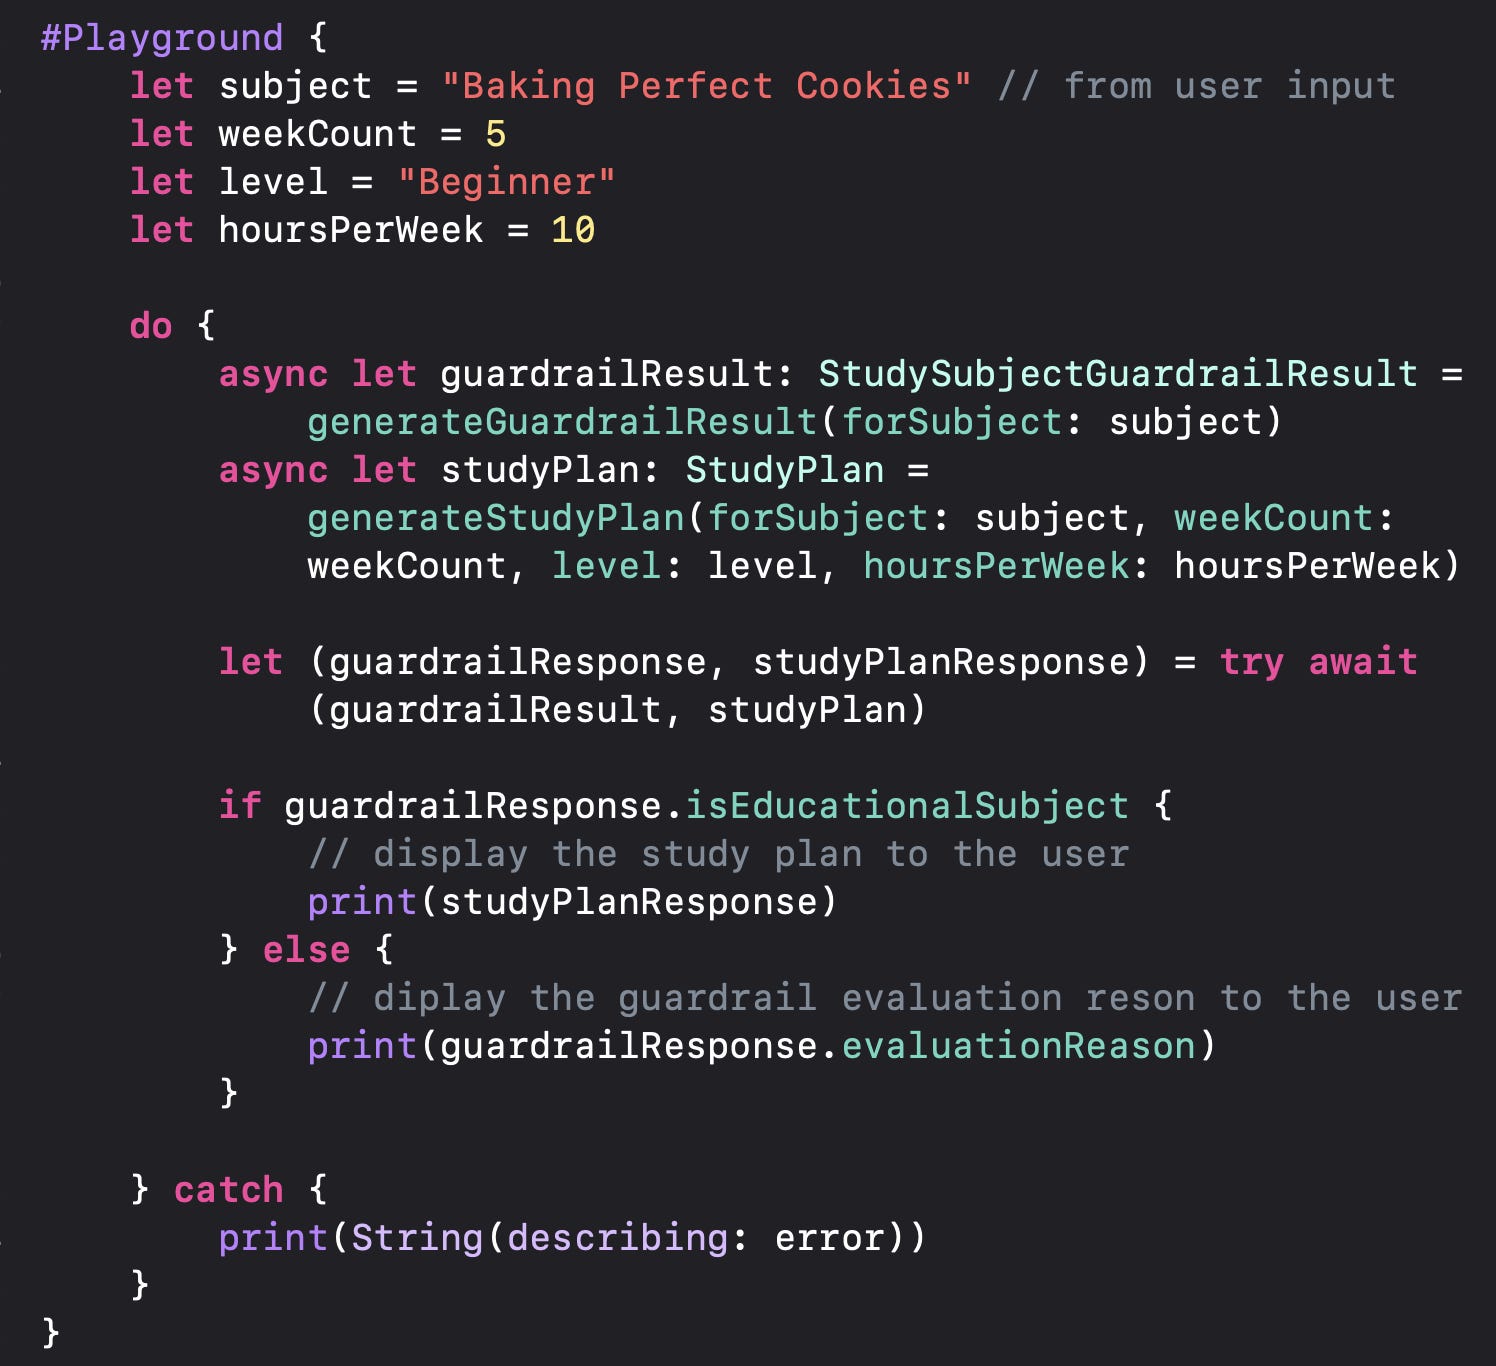
In this case, our custom guardrail gets activated:

Conclusion
With Apple’s on-device FREE FoundationModel, it makes it very fast and easy to include custom guardrails for validating user input.
However, keep in mind that this model is small (on-device), so it may not be as sophisticated as the super big LLMs that we are used to with ChatGPT / Claude / Gemini Pro. From my testing, it was super easy for the guardrails to be wrong in many cases. This might mean I need to play around with my prompt more. So make sure to test your guardrails thoroughly with many examples to make sure you get the expected results!
Thanks for covering this. From WWDC sessions it was mentioned a lot and it was curious to see how can it be done.